User guide
Everything you can do with the AmadeusShare desktop app, step by step. Prefer pictures first? Take the app tour.
Diese Seite auf Deutsch: Anleitung
1. Getting started
Install the app
AmadeusShare is a desktop app for macOS, Windows and Linux. Get it from the download page and install it like any other app. On a Mac, macOS asks you to allow the app once the first time you open it; the download page shows how.
Create an account — or accept an invitation
- On your own: open the app, choose Create an account, enter your name, e-mail address and a password, and accept the terms. You get a workspace of your own. Confirm your e-mail address with the link we send you.
- Invited by a team: open the link in the invitation e-mail. It opens the app (or the download page, if the app is not installed yet) and brings you into your team's workspace. Already have an account? Sign in, and the invitation adds the team's workspace to it.
Sign in
Enter your e-mail address and password and choose Sign In. With Remember me the app signs you in by itself next time. The bar above the form shows whether the server can be reached; your organisation may use a server of its own — click the bar to enter its address.
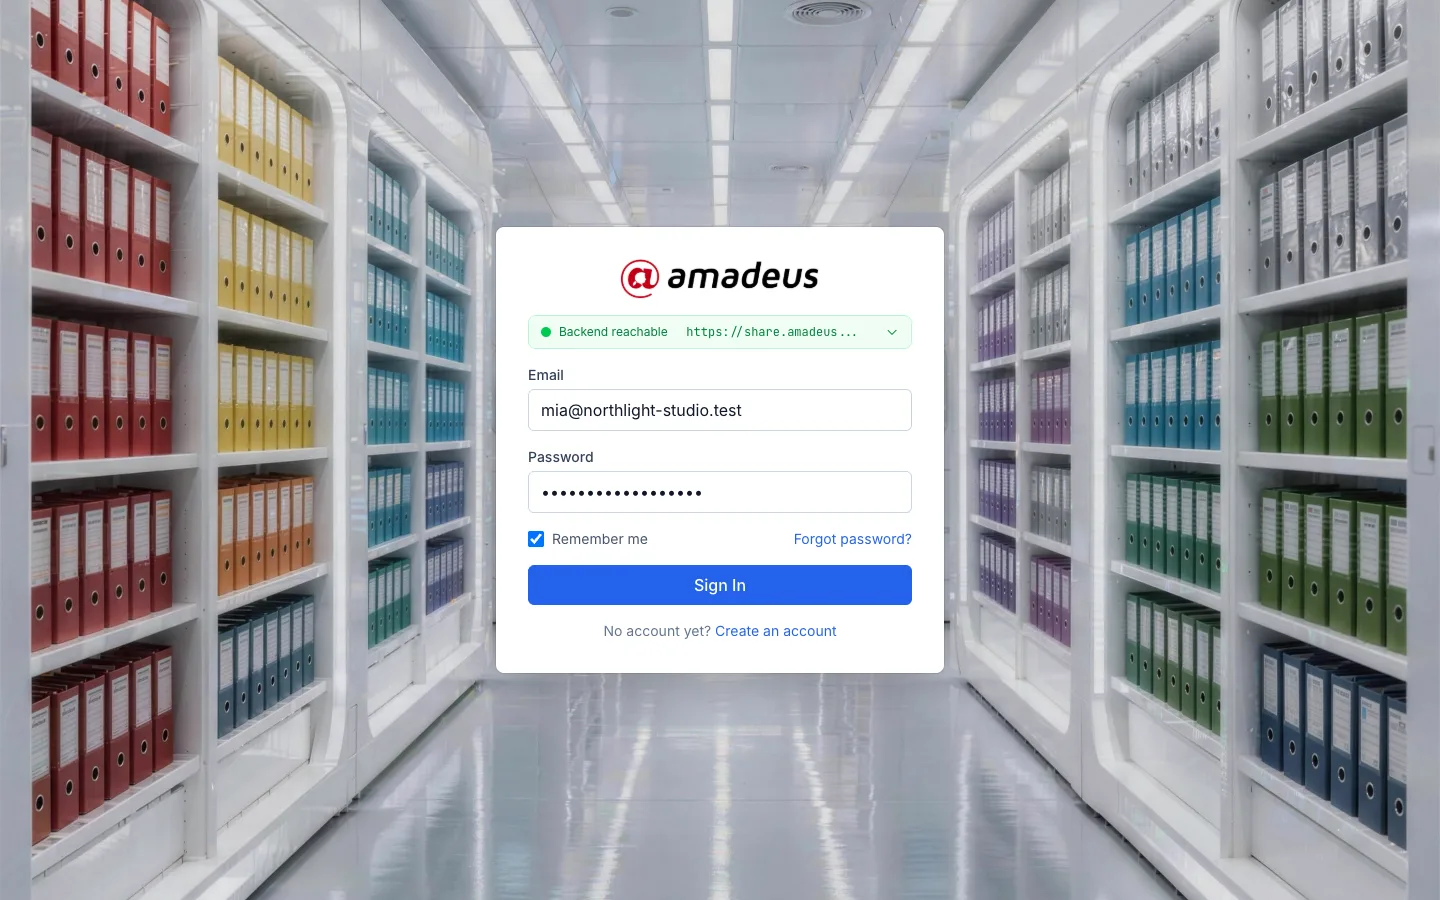
Forgot your password? Forgot password? on the sign-in screen sends you a link to set a new one.
2. The main window
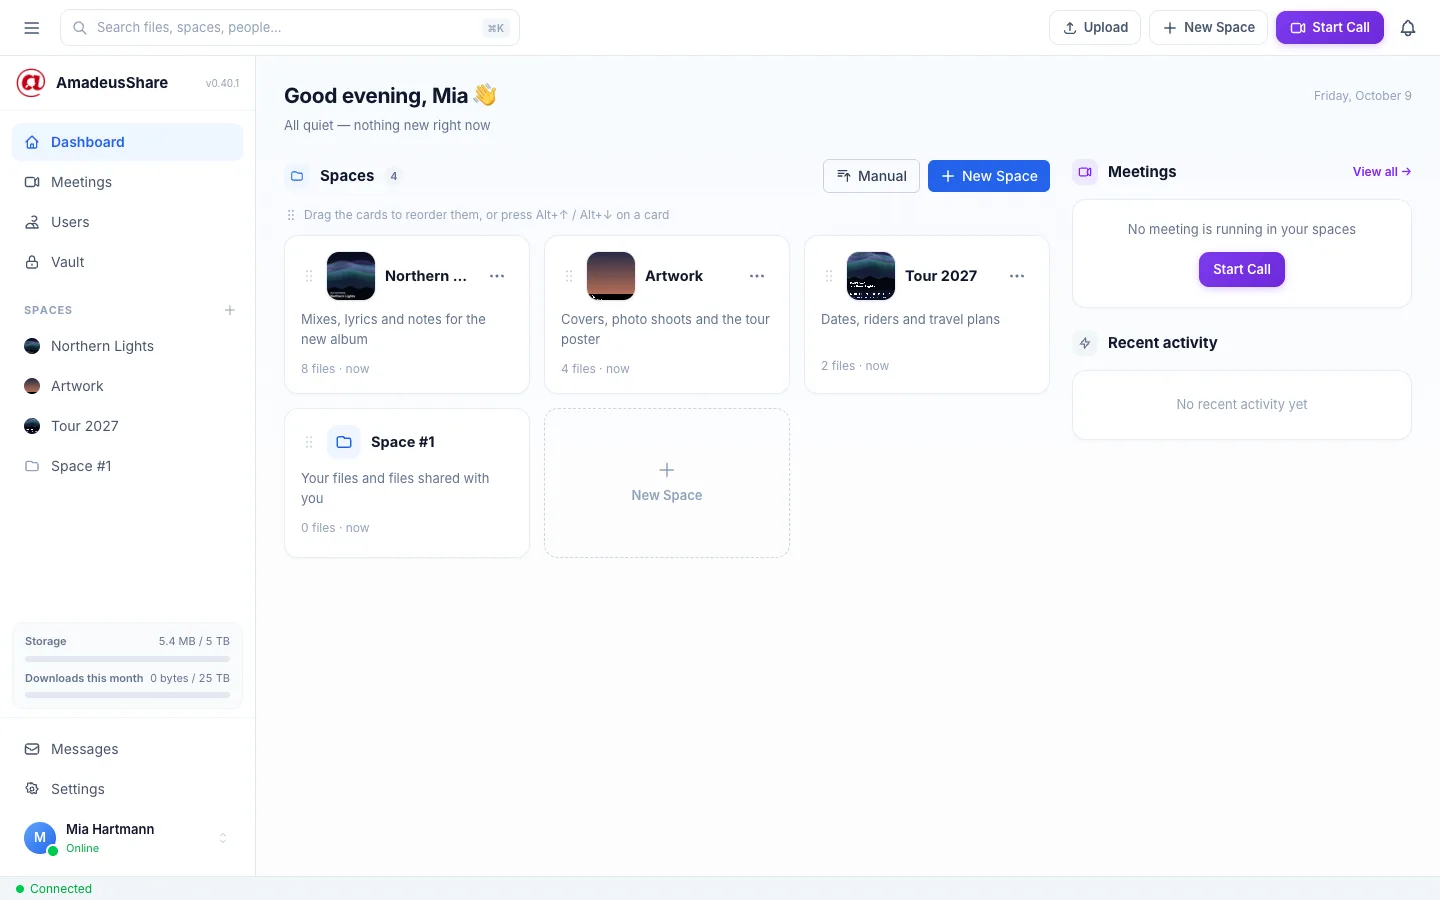
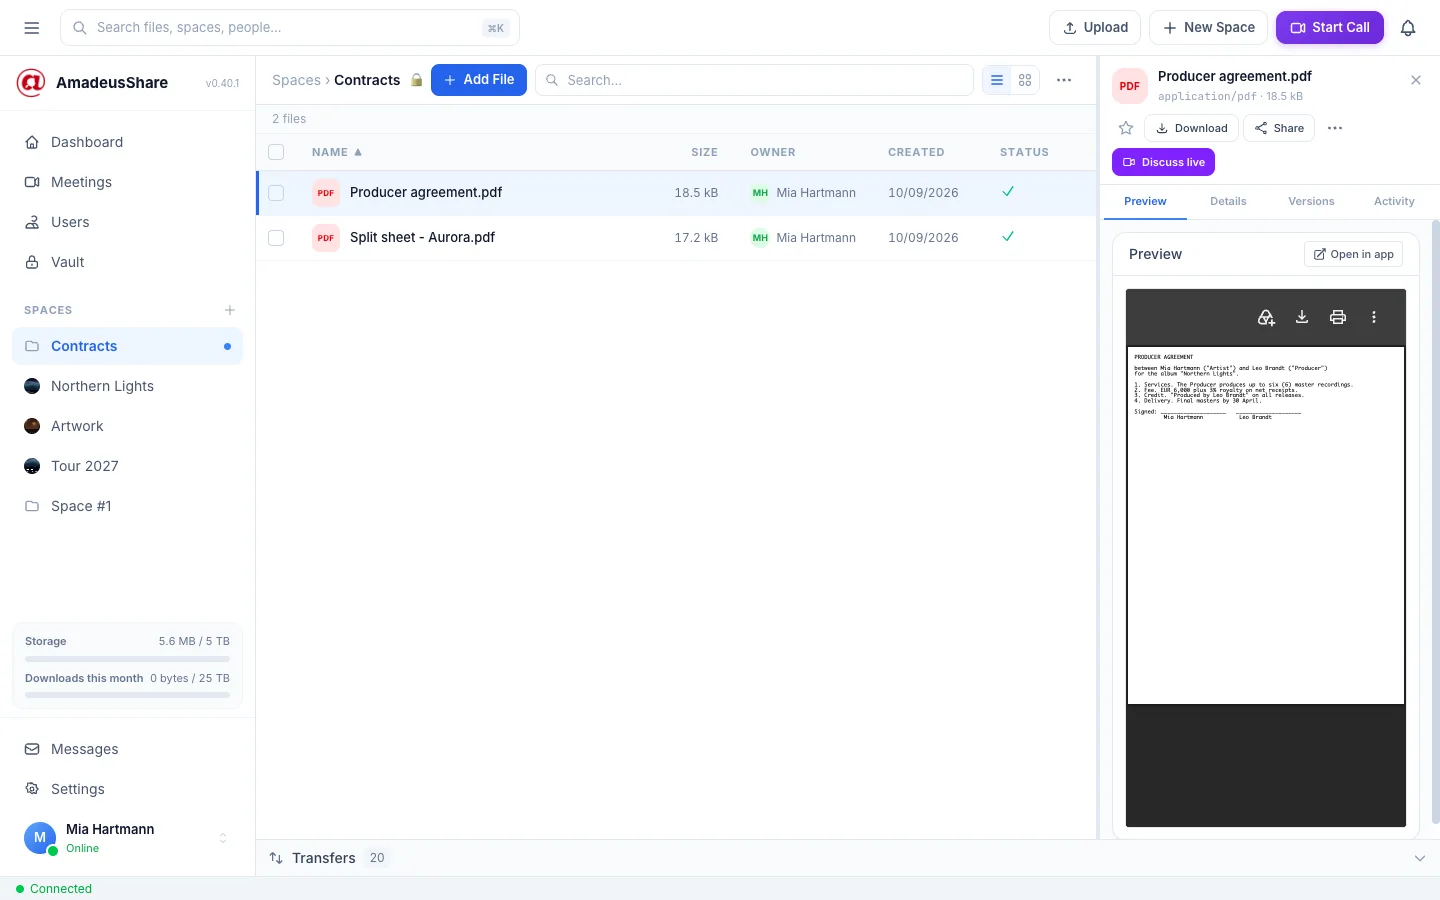
- Sidebar (left): the dashboard, meetings, users and the vault; below them your spaces; at the bottom your storage, messages, settings, and your name — click it for the account menu (settings, sign out).
- Top bar: the search, Upload (pick a space, then the files), New Space, Start Call, and the bell with your notifications.
- Dashboard: a card for each space, with its cover, description and number of files; the meetings that are running or planned; and what happened recently.
- Status bar (bottom): whether you are connected. Click it to see the server, the account and when the app last synced.
The ☰ button at the top left hides the sidebar when you need the room (⌘ B / Ctrl + B).
3. Spaces
A space is a shared folder for a project — an album, a film, a tour. Everyone with access to the space sees the same files, and every change reaches the others automatically.
Create a space
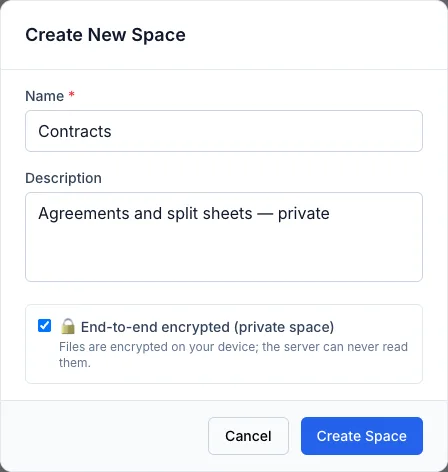
- Choose New Space in the top bar (or the + next to “Spaces” in the sidebar).
- Give it a name and, if you like, a short description.
- Tick End-to-end encrypted (private space) for files that nobody else — not even the server — may read (see private spaces).
- Choose Create Space.
Change, sort and decorate spaces
- Edit or delete: the ⋯ menu on the space's card on the dashboard. The ⋯ menu in the space's own toolbar holds its members, the trash, and more.
- Cover picture: open a picture in the space and choose ⋯ → Use as space cover. The cover shows on the dashboard and in the sidebar.
- Order: drag the cards on the dashboard (or the spaces in the sidebar), or press Alt + ↑ / ↓ on a focused card. The Manual button switches to sorting by name or date.
Space #1 is your workspace's first space; files shared with you from outside a space land there too.
4. Files
Add files
- Add File in the space's toolbar, or Upload in the top bar.
- Or drag files from Finder or Explorer anywhere onto the space — the whole view says where they go.
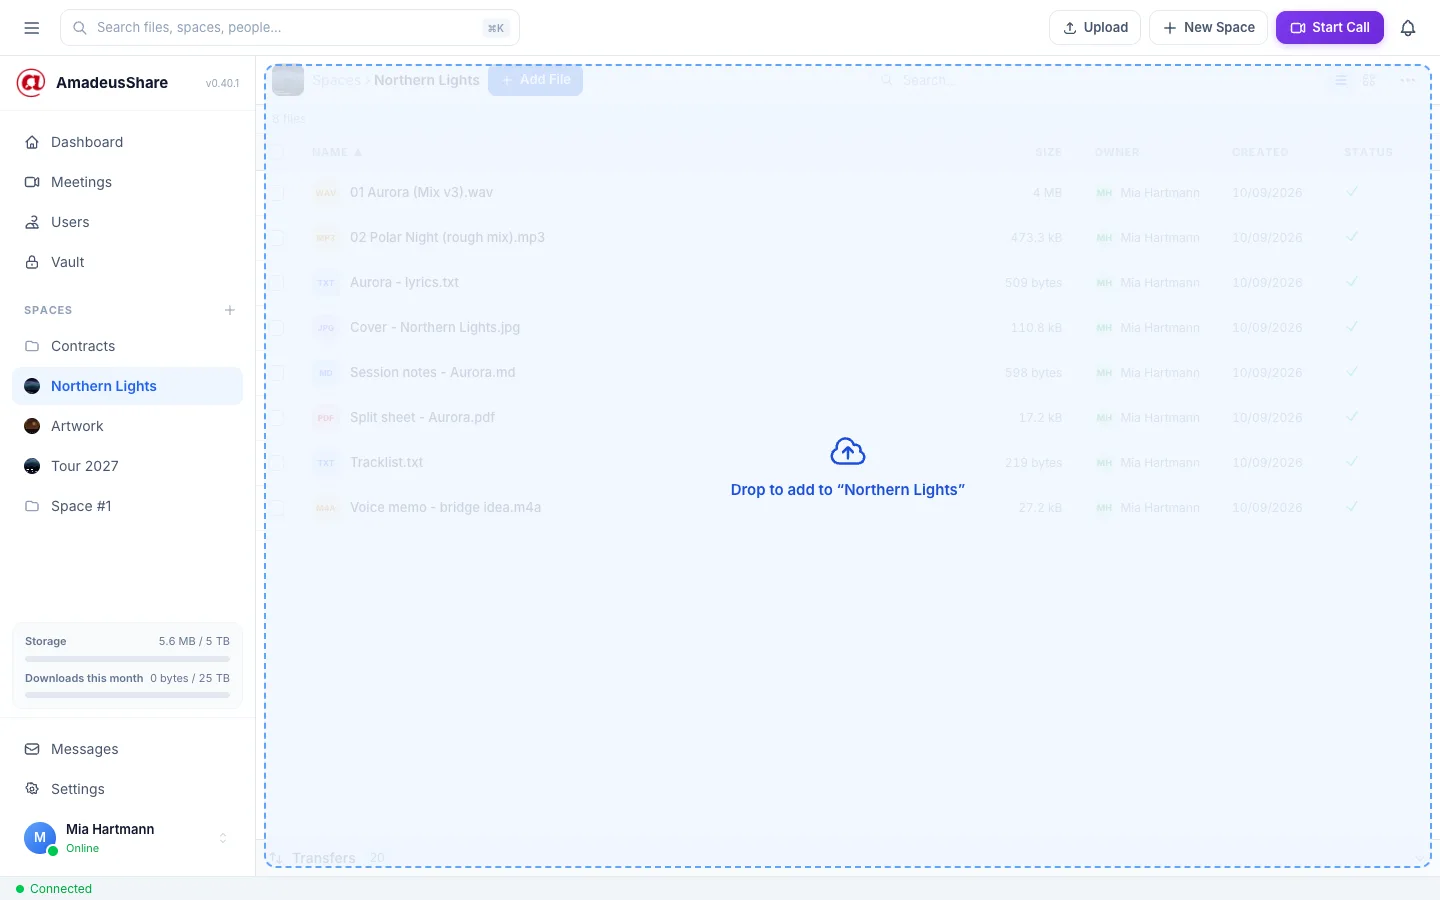
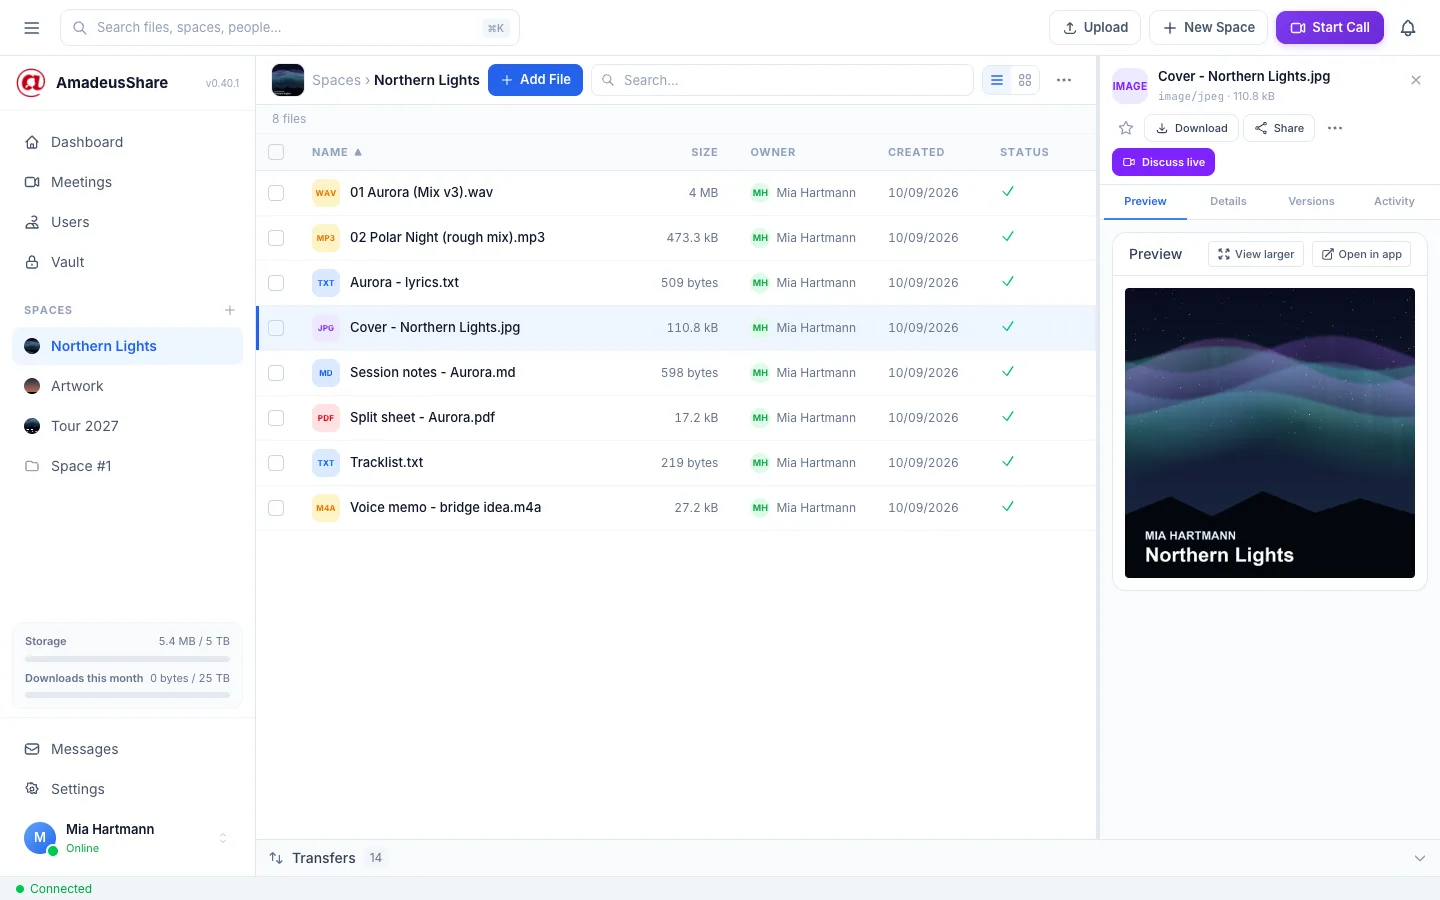
New files upload in the background; Transfers at the bottom shows the progress and closes by itself when everything is done. A green check in the Status column means the file is safely on the server.
Look at a file
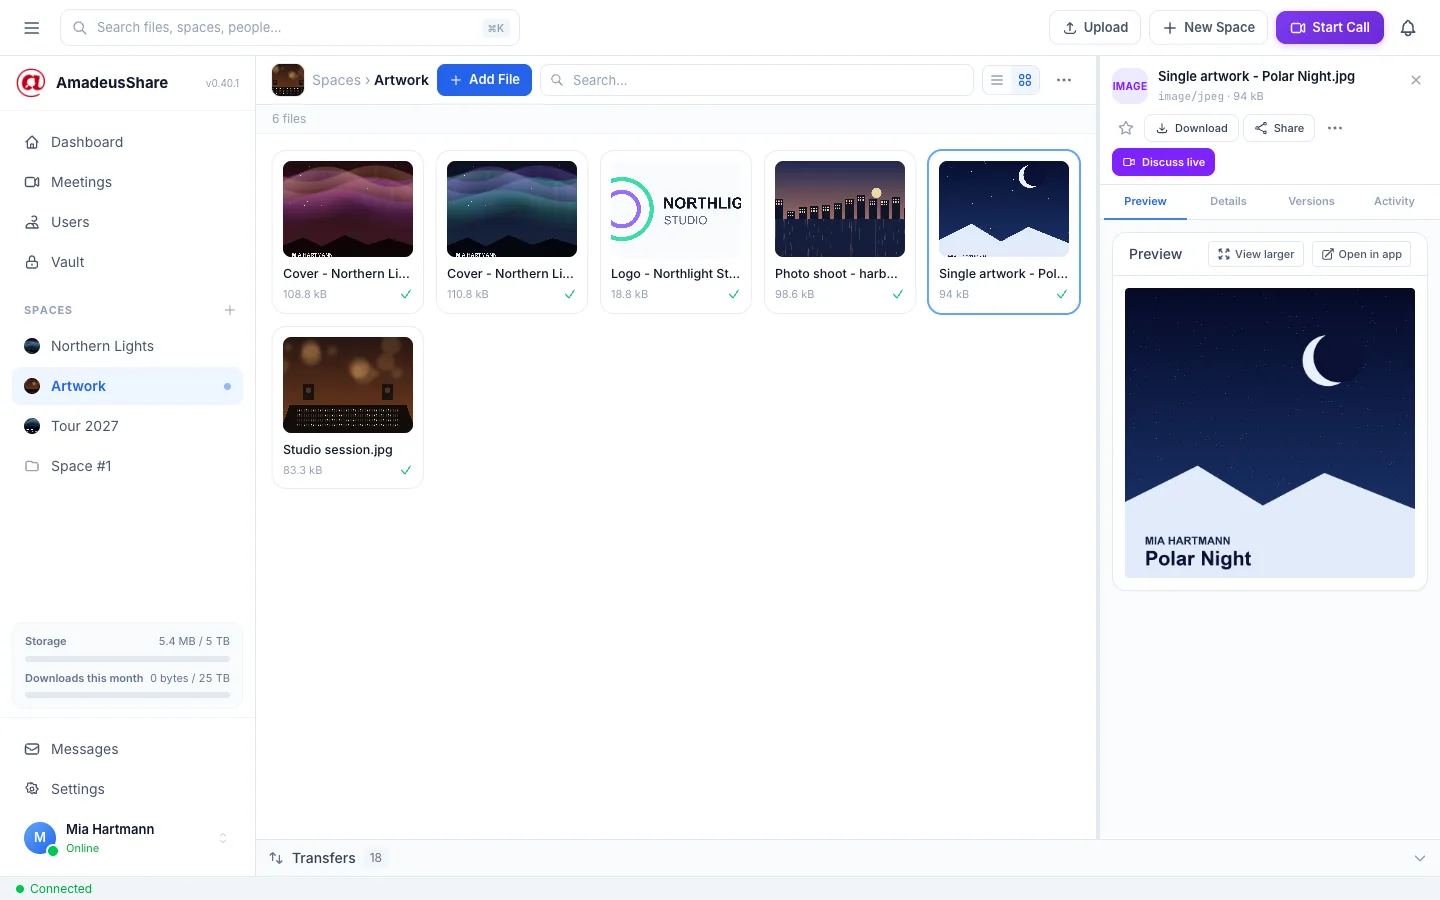
Click a file to open the detail panel. Its tabs:
- Preview — pictures, PDFs and text show here; audio and video play. Open in app opens the file in the program your computer uses for it.
- Details — size, version, dates, and the file's metadata (which you can edit).
- Versions — every version of the file (see versions).
- Activity — who did what with the file.
For pictures, the grid view (the tile button in the toolbar) is often nicer. View larger shows a picture over the whole window; zoom with + / −, the buttons, or by pinching on a trackpad, and close it with Esc.
The file's actions
In the detail panel: ☆ marks a favourite, Download saves the file, Share gives it to someone (see sharing), and ⋯ holds the rest:
- Rename File
- Upload new version — replace the content, keeping the old one as a version.
- Add to another space… — show the file in a second space as well, put a copy there, or move it.
- Use as space cover (pictures)
- Start Call / Invite people — talk about the file with the people of the space.
- Move to Trash
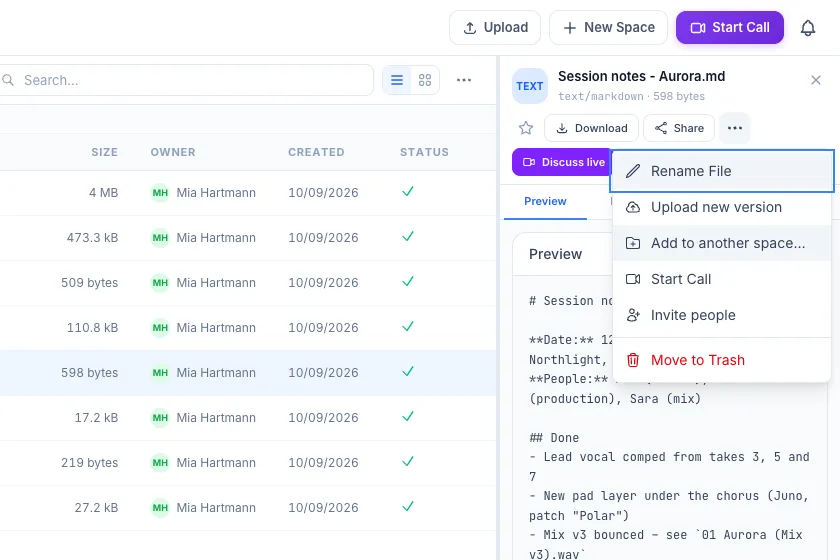
Discuss live starts a call in the space right away, with the file at hand.
Several files at once
Tick the boxes in front of the files (or press ⌘ A / Ctrl + A in the list) and act on all of them from the bar above the list — for example move them to the trash.
Trash
A file moved to the trash stays visible in its space, struck through, until it is deleted for good — after 30 days unless your settings say otherwise. Open it to restore it. ⋯ → Hide files in the trash in the space's toolbar hides them.
Deleting a shared file removes it for everyone it was shared with. The app tells you who would lose it before it goes.
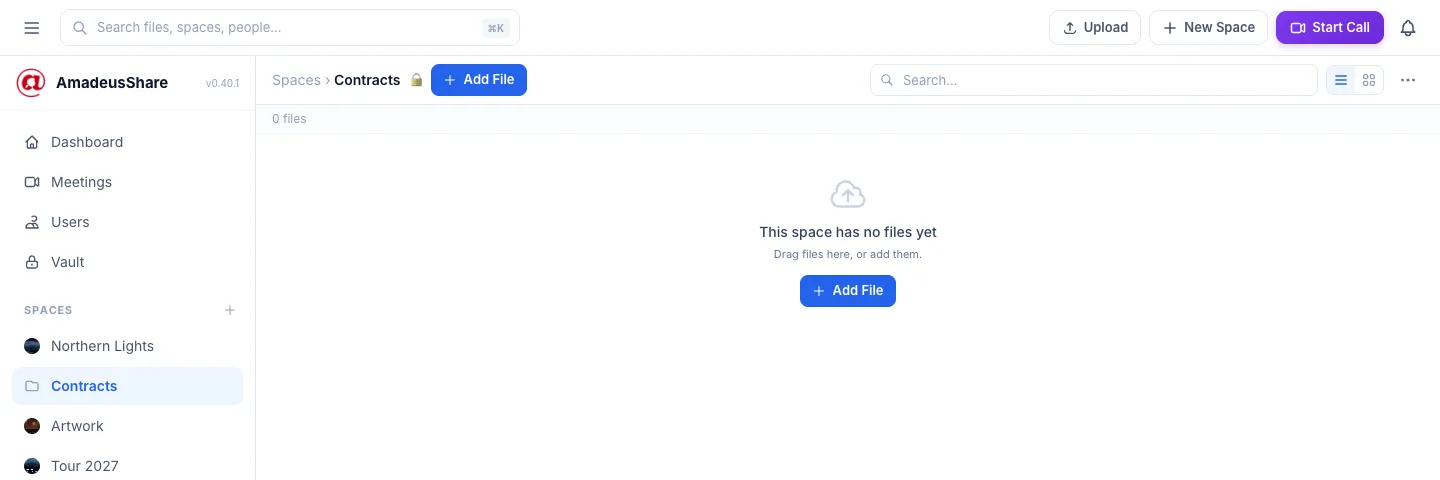
An empty space
A new space says what to do: drag files onto it or choose Add File.
5. Versions
AmadeusShare never overwrites a file: every change is a new version, and the old ones stay. The Versions tab lists them, newest first, with the note given when each was saved.
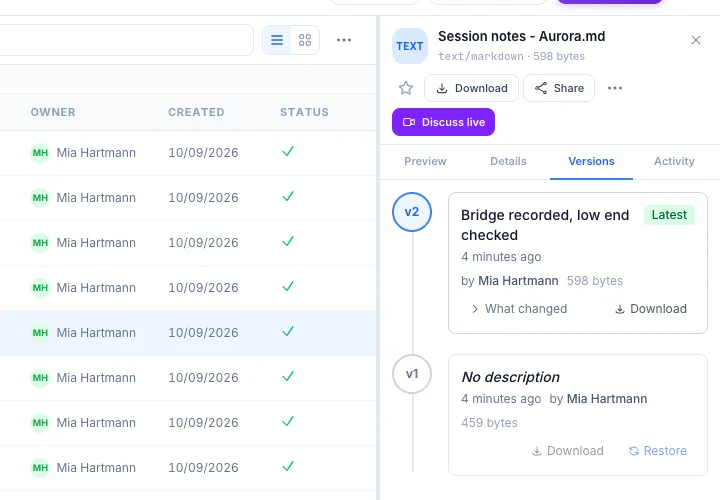
- Save a new version: ⋯ → Upload new version, pick the changed file, and describe what changed.
- See what changed: What changed on a version.
- Go back: Restore on an older version makes it the newest version again — the versions after it are kept.
- Download an old version: Download on that version.
6. Sharing
Everyone with access to a space sees its files. To give a single file to someone else, open it and choose Share.
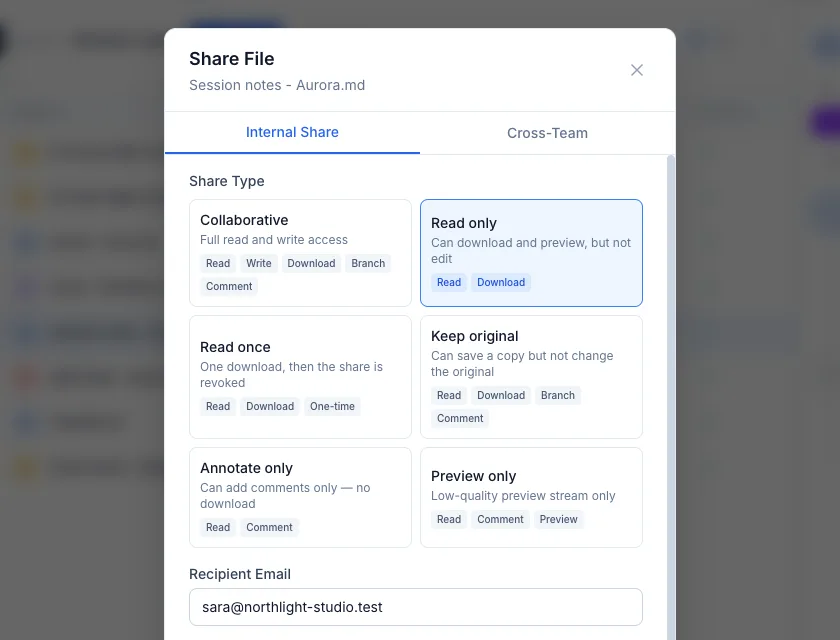
Choose what the person may do
- Collaborative — read and change the file together with you.
- Read only — download and preview, but not change it.
- Read once — one download; then the share ends by itself.
- Keep original — save a copy of their own, but not change yours.
- Annotate only — comment on it, without downloading.
- Preview only — see a low-quality preview, nothing more.
Enter the person's e-mail address, and if you like an end date (Expires) and a limit on downloads, then Create Share. The Cross-Team tab shares with people in another workspace.
Files others share with you appear under Shared With Me — find it with the search or the command palette.
A file in a private space is shared with the person's own key: it stays end-to-end encrypted on the way.
7. Private spaces (end-to-end encryption)
Files in a private space are encrypted on your computer before they are uploaded, and only the members of the space hold the key. Neither we nor the server can read them. Files in normal spaces are encrypted on the server, which holds their keys — fine for most work.
Set up encryption (once)
The first time you create a private space, the app sets up your encryption:
- Set up encryption → Get Started.
- Choose how to unlock it: a separate passphrase (recommended — a leaked login password then does not open your encrypted files) or your login password (unlocks by itself when you sign in).
- The app shows your recovery phrase: 24 words. Write them down and keep them somewhere safe, offline. The app asks for some of the words to make sure you have them.
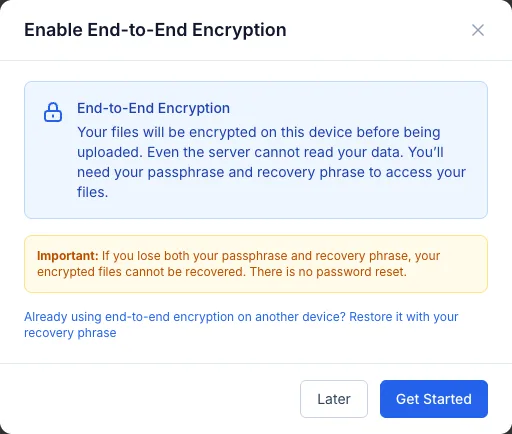
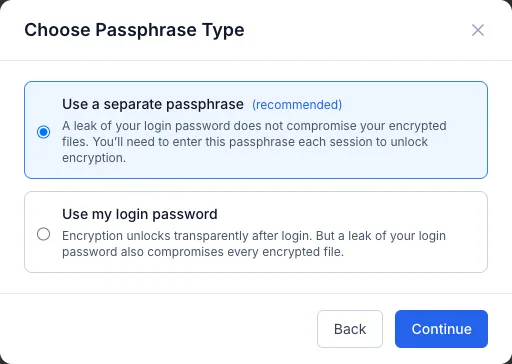
Keep your recovery phrase. If you lose both your passphrase and your recovery phrase, nobody can open the files of your private spaces — not you, not us. There is no password reset for encryption. In Settings → End-to-End Encryption you can show the phrase again with your passphrase.
Work in a private space
- Add members with ⋯ → Members; the app gives each of them the space's key. They need encryption set up too.
- On a new computer, the app asks for your passphrase (or your recovery phrase) before private spaces open.
- A normal space can become a private one: ⋯ → Convert to end-to-end encryption in the space's toolbar.
8. Meetings and calls
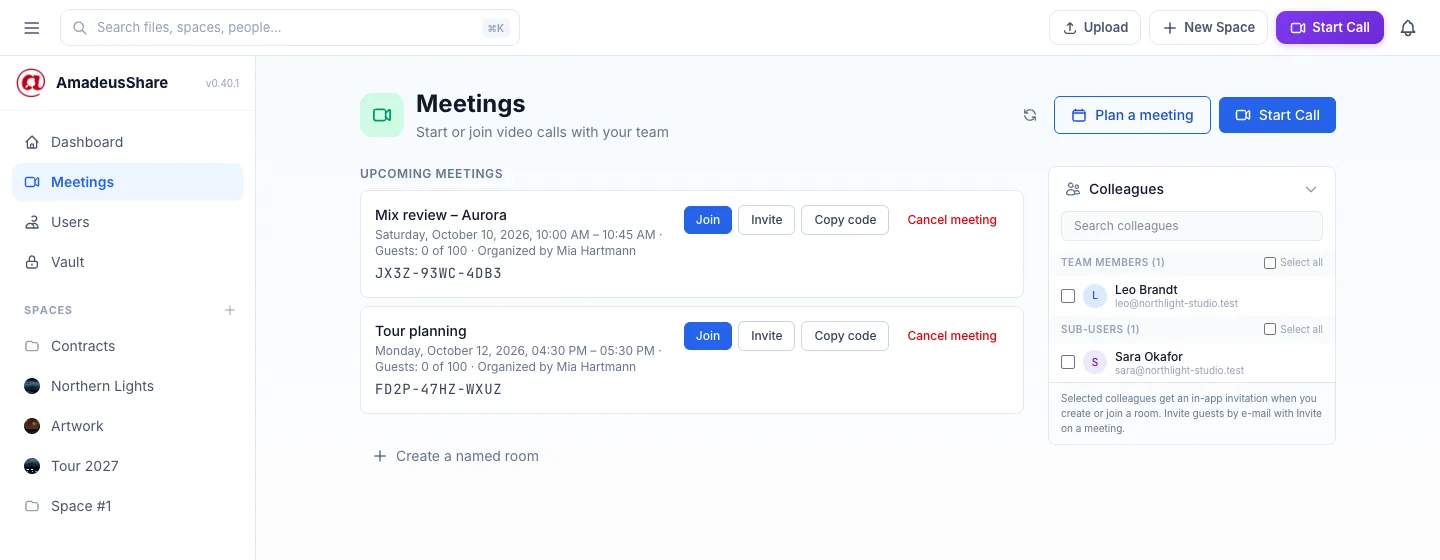
Start a call
- Start Call in the top bar starts a call at once. Pick colleagues on the Meetings page and they get an invitation in the app.
- In a space, Discuss live (or ⋯ → Start Call on a file) starts the space's call — everyone in the space can join.
- Before you join, choose your microphone and camera.
Plan a meeting
Plan a meeting on the Meetings page: give it a title, a start and a length. Each meeting gets a call code. Invite sends it by e-mail, also to guests outside your team (depending on your plan); Copy code copies it. When the time comes, Join. Guests join in their browser — no app needed — and wait until you let them in.
In a call
- Microphone, camera, screen sharing (a window or a whole screen), the chat — also for pictures — and the list of participants are in the bar at the bottom.
- The host can mute participants, ask them to unmute, and make others co-hosts.
- Need a file? Go back to the app with the app icon at the top; the call keeps running, and a bar at the top of the window leads back to it.
Calls are not recorded.
9. Your team
The workspace's owner and its administrators manage the team under Users. Members see who else is in the team — or, where the team works in groups, the people of their own groups.
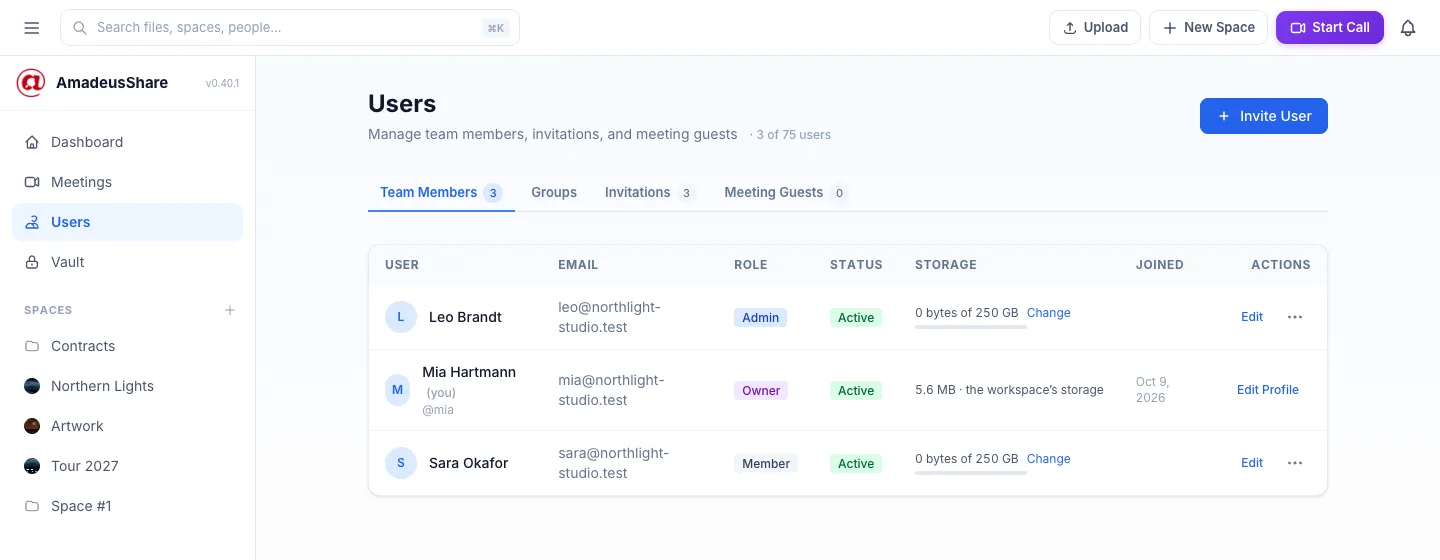
- Invite: Invite User, enter the e-mail address and choose a role — Member or Admin. The Invitations tab shows which invitations are still open and whether the e-mail arrived.
- Edit a member: Edit in the member's row (name, role); Change sets how much storage they may use.
- More: the row's ⋯ menu — make them the owner of the workspace, suspend them for a while, or remove them.
- Groups: the Groups tab decides who sees whom — everyone, or only the people in the same group.
- Meeting guests: people outside the team whom you invite to meetings.
When someone leaves, the files of the normal spaces stay with the workspace.
10. The encrypted USB vault
The vault keeps a copy of your spaces on a USB drive that you hold — your offline backup, encrypted with a passphrase of its own.
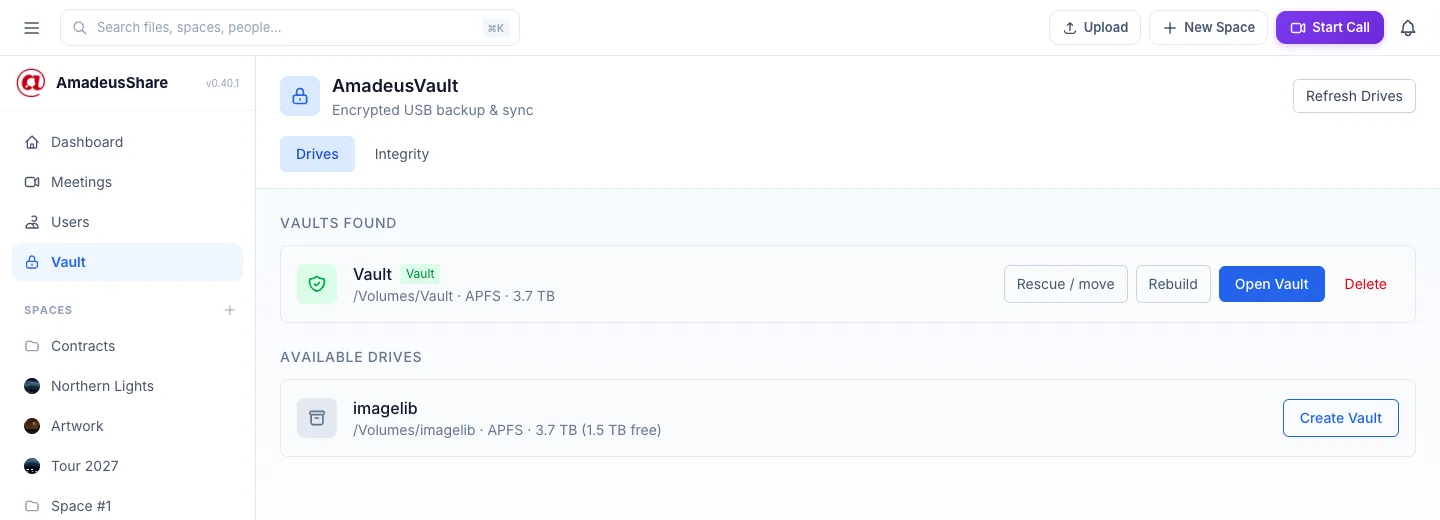
Create a vault
- Connect a USB drive and open Vault in the sidebar.
- Choose Create Vault next to the drive, pick a size and a passphrase.
- Write down the vault's recovery phrase — it opens the vault if the passphrase is lost.
Use it
- Open Vault with the passphrase. While it is open and connected, the app keeps it in sync with your spaces; you can choose which spaces go into it.
- The Integrity tab checks every file in the vault against this computer and the server, and repairs what it can.
- Restore: on a new or reinstalled computer, open the vault and bring its files back onto the computer. The app first shows what would come back; files you have already are left alone.
- Rescue / move copies everything that can still be read into a new vault on another drive — when a drive gets old or shows errors. The old drive is only read, never changed.
- Rebuild deletes the vault on the drive and creates a new, empty one.
Keep the vault's passphrase and recovery phrase apart from the drive. Without them, nobody can read the vault — that is the point of it.
11. Search, notifications and shortcuts
Search
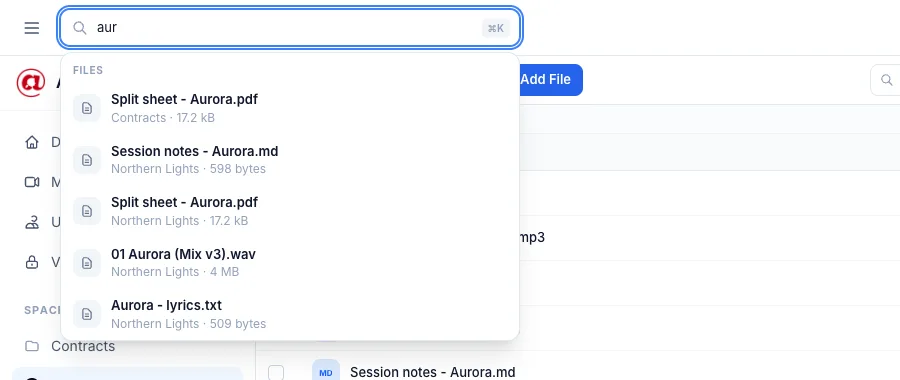
The search at the top (⌘ K / Ctrl + K) finds spaces, files and people as you type — files also by their AI description, where your workspace has one. It finds the app's commands too: type “settings”, “new space” or “sign out”. In a space, the search field in its toolbar filters that space's files.
Command palette
⌘ P / Ctrl + P lists every command — go to a page, create a space, open the help — to run one without the mouse.
Notifications
The bell collects what concerns you: shares, invitations, files handed over to you. Files the sync could not decide about on its own (for example a new file with the same content as one already on the server) are listed first, with Review.
Keyboard shortcuts
| Action | macOS | Windows / Linux |
|---|---|---|
| Search | ⌘ K | Ctrl + K |
| Command palette | ⌘ P | Ctrl + P |
| Settings | ⌘ , | Ctrl + , |
| Show / hide the sidebar | ⌘ B | Ctrl + B |
| Next / previous file (in the file list) | ↑ ↓ | ↑ ↓ |
| Open the file (in the file list) | Enter | Enter |
| Move to the trash (in the file list) | ⌫ | Del |
| Select all files (in the file list) | ⌘ A | Ctrl + A |
| Clear the selection (in the file list) | Esc | Esc |
| Move a space up / down (on a focused card) | Alt + ↑ ↓ | Alt + ↑ ↓ |
12. Settings and account
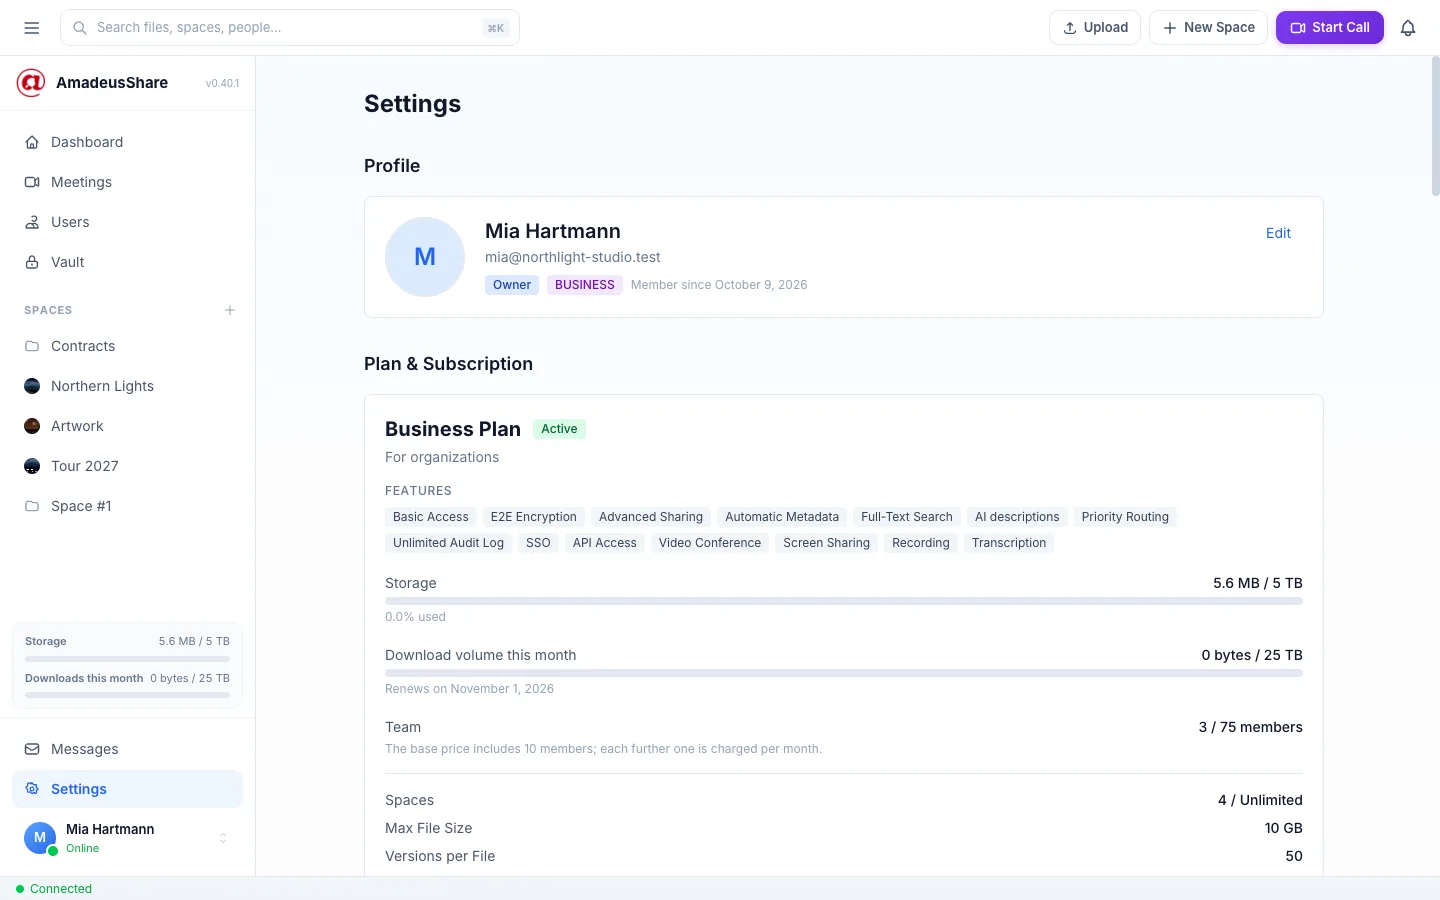
- Profile: your name.
- Plan & Subscription, Usage: your plan, its features, and how much storage and download volume you use.
- Preferences: language, light or dark theme, and how long deleted files stay in the trash.
- End-to-End Encryption: your encryption, and your recovery phrase (shown again with your passphrase).
- Two-step verification: a code from an authenticator app in addition to your password — recommended.
- Change Password, Email address
- Your data: Export my data saves a copy of your data.
- Danger Zone: delete your account.
13. Getting help
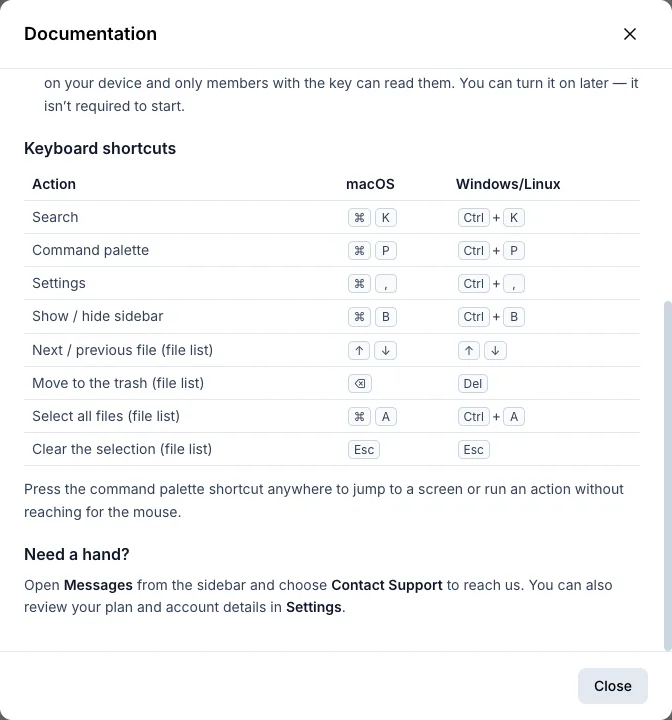
- The help in the app (command palette → Help) explains the main ideas and lists the shortcuts.
- Messages in the sidebar → Contact Support reaches us from inside the app.
- Or write to us through the contact form.